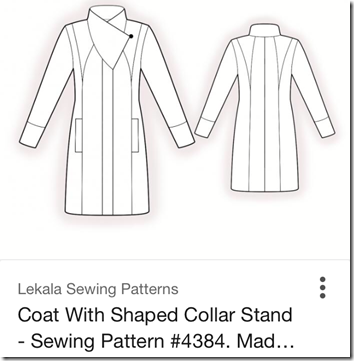
Posts

Showing posts from November, 2016

The coat revealed

Image
Without further ado, here is my coat. Awefully difficult to photograph. I made most of the photos lighter to show some details, but still hard to see.     I’m quite impressed by the fit of this coat. The only thing I changed was to take in a little at the center back seam at waist level, I made no other changes. I indicated that I wanted my sleeves longer and they are the perfect length. As the instructions are not helpful I would not recommend this pattern if you don’t have a lot of experience in jacket or coat making, but if you have it’s a great pattern. Remember to check the pocket position if you’re not tall (as I said in a previous post they were much too low for my friend’s coat originally). The extra layer for warmth is wonderful, it started freezing here and I’ve worn it already. Very, very comfortable. My next project will be a bit less complicated (I think).

Pocket with flap in seam

Image
Don’t know how to call it but that’s what it is: a pocket with flap in a seam: I wanted to topstitch it, preferably in one continuous line. This means that the pocket must not be completed fully, otherwise you would close the pocket while topstitching. Below how I did this. Sew the pocket flap and attach the pocket lining to it. This is the side of the pocket that will be to the wrong side of the front coat when finished. I used one layer of fabric and one layer of lining for my flap, as the fabric was thick. I topstitched with special thread in a long straight stitch. I used length 4, a lot of the length disappears in the fabric layers. Mark the stitching line on the right side of the pattern piece. I used tailors chalk for this (I did not cut exact seam allowances thereofr the line is not at the same distance from the edge, I marked all seamlines on the inside).   Sew the flap to the front, right sides together, from the exact edge of the flap to the other edge, the pock...

Coat progress

Image
At the start of the week I had high hopes of finishing my coat before Friday but it didn’t work out that way. Half of my sewing room was taken over by the stuff builders brought in to work on our new bathroom. My goodness, what a lot of stuff (and space) they need. There is a small corner left for me, and I did sew a bit now and then, but it’s more difficult with such a large project as a coat. The good news is that the lining is finished and waiting to be sewn into the coat (and we will have a nice new bathroom soon). Again a very wild print for the lining. In this coat I chose to quilt the lining to add an extra layer of warmth. I used flannel for it. I think I will not sew the hem of the lining to the coat but keep it hanging free. A nice finish for the hem of the coat was called for. I didn’t have any bias tape or fabric to make it around. Then I saw the petersham ribbon that I had used for a skirt for my daughter (she left the house before I had a chance to make a picture) ...

Separate button placket – coat

Image
I’m steadily working on my coat. I remembered something to be aware of for those who have ordered this pattern: check the position of the pocket markings in the front pattern pieces. For me they were fine, but my friend is shorter and the position of the pockets was very low (lower than her hands). The button placket is sewn to the facing separately, creating an invisible button closure. As I mentioned in my post the other day the Lekala instructions are not very good, to say it mildly. This is the way I did them. In the pattern the placket is cut from lining only. I chose to have one layer of lining, one of the coat fabric. From the facing pattern I marked the seamline and the top button hole with tailors chalk. Placed the placket on the facing to mark the position. Then folded the zigzagged edge under and pinned it in place. Sewed it from the lining side to the facing and pressed towards the front. I stitched the long edge and the space between the buttons. Writing this dow...

Another coat

Image
Not having sewn a coat in years, I’m now working on my second in one season. Must have gotten a coat sewing bug. As most of you know, I like sewing jackets and coats are in the same field, just a bit bigger and heavier. During the Canterbury get-together with my sewing buddies Vivien was working on a coat from a Lekala pattern. I instantly loved the pattern and its details and her result was stunning too. This is her coat  using this pattern.   Not being original (imitation is a form of flattery?) I bought the pattern. I am still to unsure how to draft the collar like this and at 2.99 euro I could hardly go wrong. It took some time to trace the pattern (getting more used to pdf patterns but still not my favorite) and the fit is good. Seeing Vivien working on it and her photos as a “post-it note” were extremely helpful in construction, as the Lekala instructions are completely useless. She used piping at the seam lines, I’m doing topstitching. Here’s what it looks like in...

Burda 6874–Shirt for my son

Image
It’s taken longer then I intended as the coat project came in between. It’s done though and I finished my first men’s shirt. It wasn’t complicated, just a bit different on some places. I’m not completely satisfied with the collar with stand, even after I took off the first stand and re-did it. It’s not visible in the pictures but it could be better. The pattern is wonderful, everything matches perfectly and the size (taken from neckline measurement) is quite good. It’s what I expect from Burda and they do not disappoint. I don’t have pictures of my son wearing the shirt. In the meantime he has found a job and having photos taken with his mother’s shirt is not a priority (which I understand). There is some work to be done on the fit in the shoulder area. Something in the line of forward shoulder adjustment. But my son is satisfied with this first one and there will be more to follow. I highly recommend Pam Erny’s tutorial for the sleeve placket, she explains it so clearly: Shirt slee...

Book review - Patternmaking for jacket and coat design

Image
A few of you expressed an interest in a proper review for the book Patternmaking for jacket and coat design by Pamela Vanderlinde. I found this book online when I was browsing through online bookstores looking for another book. As I’ve done quite a bit of pattern drafting in the past 2-3 years and have bought quite a few reference books on drafting as well, this caught my eye. Seeing some pages of it online I got really interested. It seemed to work from the same kind of block/sloper that I made for myself in Suzy Furrer’s Craftsy class so would help me get further from that starting point. I was not disappointed: it does work from a block or sloper, but the draft of a basic block or sloper is not included in the book . The author assumes you have a sloper to start with (explicitly mentioned in the book) and also assumes you know the basic terminology. I don’t have any problems understanding what is meant. Drafts for 1 piece or 2 piece sleeves are included and drafted different from ...

New book

Image
I pre-ordered this book a few weeks ago and when I came home tonight it was in the mailbox. I had been looking forward to it. There was no way to know whether it was what I was looking for. A few pages on Amazon looked ok so I just took my chances. After a quick look through it I think it's great as I was looking for the next step on drafting, especially coats and there is not much around on that subject.  Would you like to know more? Then I'll do a proper review soon. 

A purple coat

Image
This is the first coat I’ve sewn in years. I’ve been planning one for a number of years now, but it never happened. I hope to have photos of me wearing the coat later, but sometimes that just doesn’t happen either. I’ve worn it outside already and it’s nice and comfy. Great coat for a bicycle ride to run some errands and it’s a good car coat too. The coat is not very heavily tailored. It has interlining of cotton for extra warmth as I showed in another post. Of course sleeveheads and shoulderpads but not completely fused with interfacing on the front, no shoulder stay for example. That’s for another time. I can see that would further improve it, but for now I’m really satisfied with the result. I would do a few things different next time (for example decide in an earlier stage to use interlining or not, the buttons could have been a bit larger), but we all have those thoughts just after we finish such a project, don’t we? The pattern I started of with was from BurdaStyle magazine, sept...